LASH LUXE 101: MASTERING THE ART OF CHUNKY STRIP LASH SETS
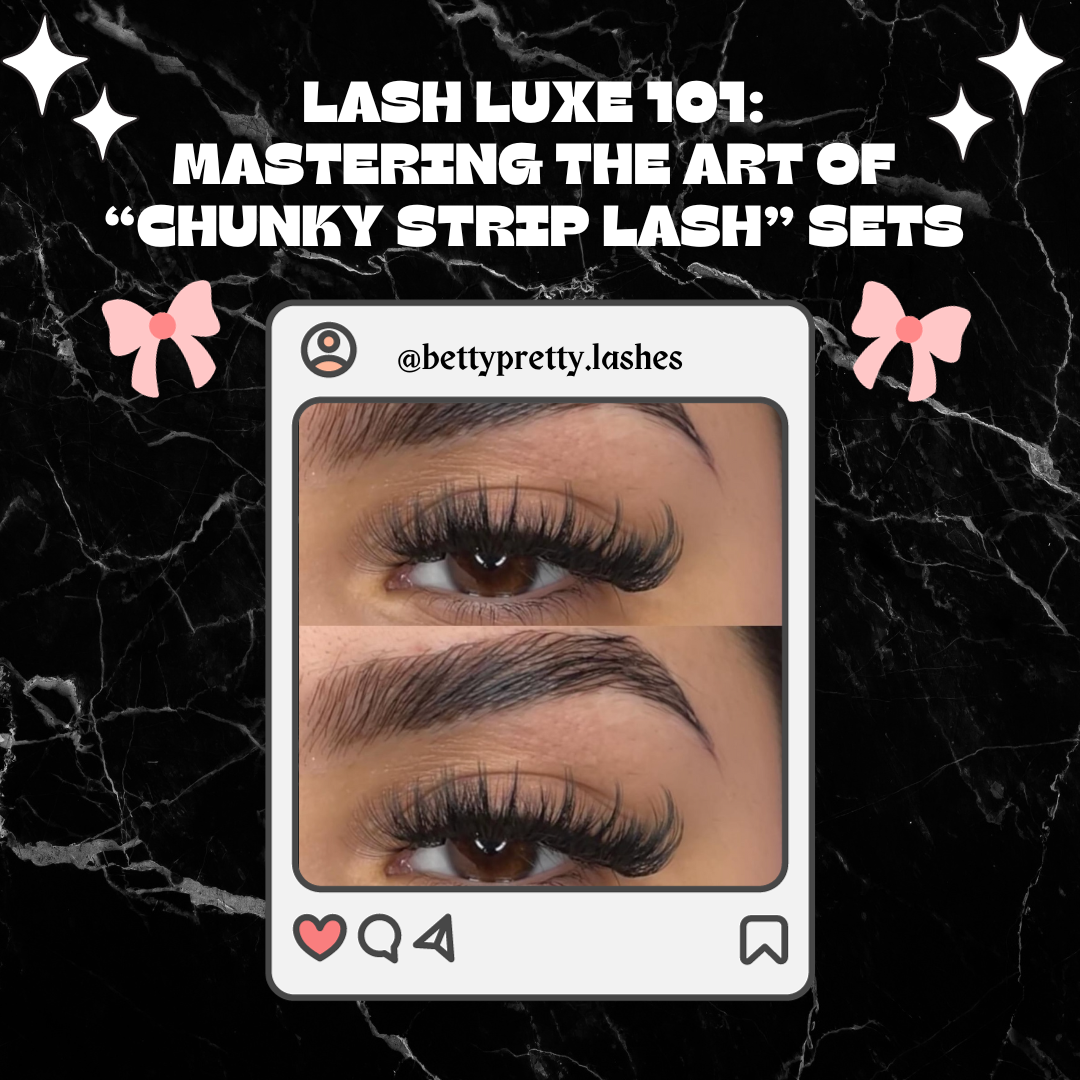
When it comes to eyelashes, there's no shortage of styles to choose from, but the chunky strip lash look stands out for its bold and dramatic appeal. In this guide, we'll delve into the art of creating this striking lash style. The chunky strip lash look involves a volume set with spikes that are chunkier than the typical wispy set. It's the perfect choice for those who want to make a statement and draw all eyes to their captivating gaze.
What is the chunky strip lash look?
The chunky strip lash look is characterized by two key elements: volume fans and spikes. Here's what each of these components entails:
- Volume Set: A volume set refers to the technique of applying multiple lightweight lash extensions to a single natural lash. This creates a fuller, denser appearance, and it's the foundation of the chunky lash look. You’ll want to use narrow fans for this look to achieve that dark and boldness.
- Spikes: Spikes are thicker and have a more prominent, angular appearance compared to the typical wispy lash extensions. These spikes add a touch of drama and boldness to the look.
Our new SATIN MINK trays are perfect for this set! They’re our darkest lashes - darker than our cashmere and matte mink! They effortlessly embody the captivating eyeliner/dark lash line look. Don’t miss out and try them out today babes!!


How do I make chunky spikes?
Wispy lashes are characterized by their feathered and flirty look - the spikes adding a touch of drama. Here's a step-by-step guide on how to make chunky spikes to get that wispy look:
- Your spikes should be at least 4 millimeters longer than your base lengths in order for them to fully show. They should be placed on the top layer of lashes only. Use .03 or .05 lashes in D curl for that dramatic curl that will make your spikes stand out..
-
To make a spike, there are a couple ways:
Primer: Apply primer on a microbrush and run the microbrush across the strip of your lashes. The lashes will group up together and grab higher up the lashes so they don’t fan and stay closed.
Without primer: Grab several individual lash extensions (usually 4-5D) higher up the lashes while holding them tightly at the top to create a closed fan. Use a glue ring with slits to keep the bases skinny. - To achieve the spiky effect, group at least four spikes placed right next to each other to mimic the appearance of one thick spike. The spikes are typically placed evenly throughout your set - at least 5 or 6 sections
After you’ve placed all your spikes, fill in the rest with your base lengths. Use narrow fans for more density in your set. We recommend using CC curl for the base to give that softer look and will blend seamlessly with your spikes.
We are drooling over these chunky lash sets!! Our lovely customers are slaying the game!!


Aftercare
Keep these tips in mind to enjoy your gorgeous lash extensions to the fullest!
Keep 'em Dry: Avoid water on your lashes for the first 24-48 hours after application to let the adhesive set.
Gentle Cleansing: Cleanse lashes with a lash extension-friendly cleanser. Use a brush to keep them tangle-free.
No Oil-Based Products: Opt for oil-free makeup and skincare products. Oil can break down the adhesive.
Regular Refills: Maintain that lush look by scheduling regular refill appointments every 2-3 weeks.
Brush, Brush, Brush: Use a spoolie to brush through lashes daily, keeping them neat and separated.
With the right technique and the expertise, your clients can achieve that bold and dramatic false eyelash look with lash extensions. Say goodbye to the hassle of applying falsies and hello to effortlessly captivating, lush lashes that last. If your clients have ever been wanting to try lash extensions, now is the perfect time for them to make the leap and enjoy the allure of beautiful, bold, and captivating lashes every day!

